Insoles enhance the feel of boots and shoes, especially if their original insoles are damaged or have significantly deteriorated over months or years of heavy use. Depending on the insoles, they can make the footwear feel much softer or offer strong shock absorption to protect the feet against discomfort. To make the most out of the insoles you choose, it’s important to get them in the right size so they can fit easily into the boots or shoes that need to be enhanced. Trimming won’t be needed for insoles that are offered in exact sizes – or in sizes that cover two shoe sizes – but is a necessary step for insoles options that are available only in one size.
How do you properly trim new insoles?
There are two ways to tackle this task, depending on the type of insoles you choose and buy. The first one that will be covered is pretty straightforward, as you’ll only need to follow the guides already incorporated into the insoles’ structure. The second method is slightly more challenging because it requires you to use the used or old insoles as guides to create appropriately sized guides.
Using Insoles’ Size Guides
Some insoles in the market are built with size guides that are usually embossed or printed on the back portion near the toe area. The guides – which can be represented by numbers or letters – indicate where you will need to trim the insoles to get the correct shoe size that will fit into the boots or shoes of the same size.
- First, it’s important to know the shoe size you want to achieve to ensure that the insoles will eventually fit perfectly into the footwear. If unsure of the size, it’s best to have the boots or shoes (where the insoles will go) handy while trimming the insoles to size.
- Choose the sharpest pair of heavy-duty scissors that you can find to help with the trimming process. Small scissors that aren’t that strong may not be able to cut through the robust material that’s often used for high-quality insoles. Meanwhile, the scissors’ sharpness will ensure that you’ll be able to cut the material more precisely and achieve an accurate size in the end.
- Using the size indicators at the back, cut the insoles to the desired size. Make sure to trim uneven edges so you’ll end up with a more streamlined product.
- Slide the trimmed insoles into the boots or shoes to check if they fit properly. If not, you can check if excess material needs to be cut so the insoles can slide in more easily into the footwear for a more proper fit.

Using the Boots’ (or Shoes’) Original Insoles
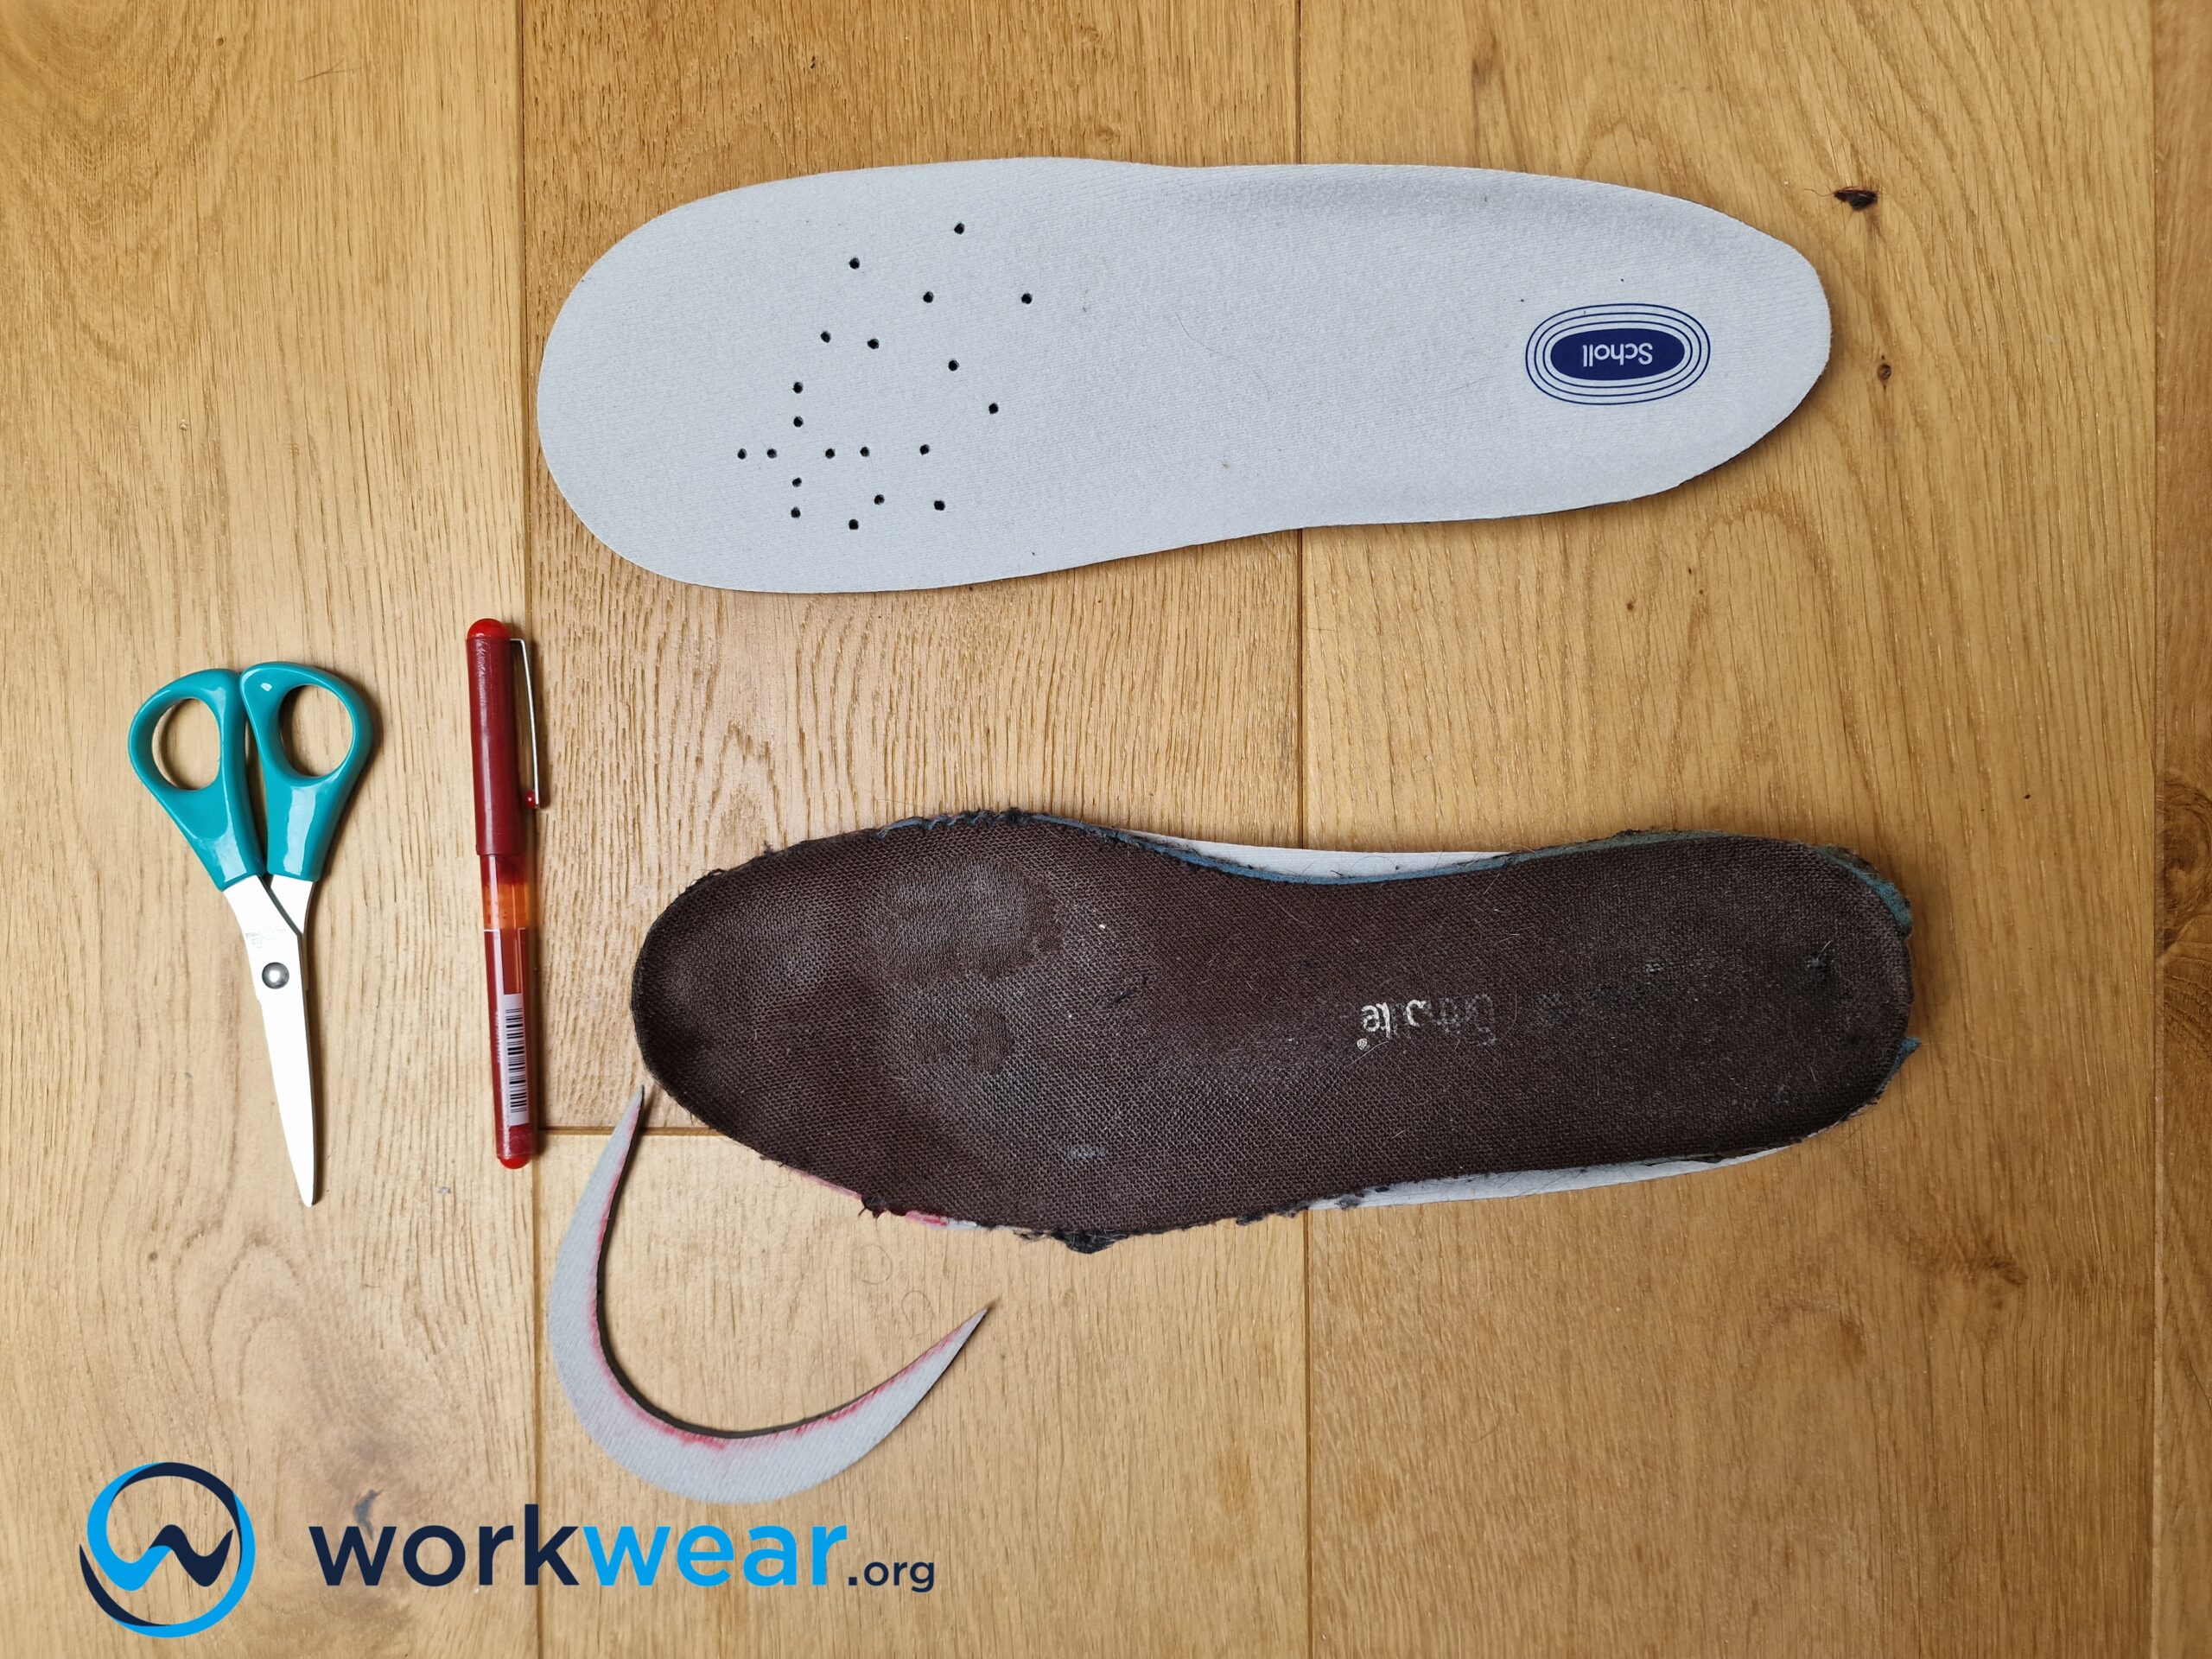
Only some insoles come with sizing indicators that can be used as guides for trimming. In case the insoles you choose need to be built with these sizing guides, you can still do something to help you modify the insoles to the size you need. This second method requires using the original insoles of the footwear as a guide to get the proper size. Aside from sharp scissors, you’ll need a marker or pen to outline the appropriate size onto the new insoles.
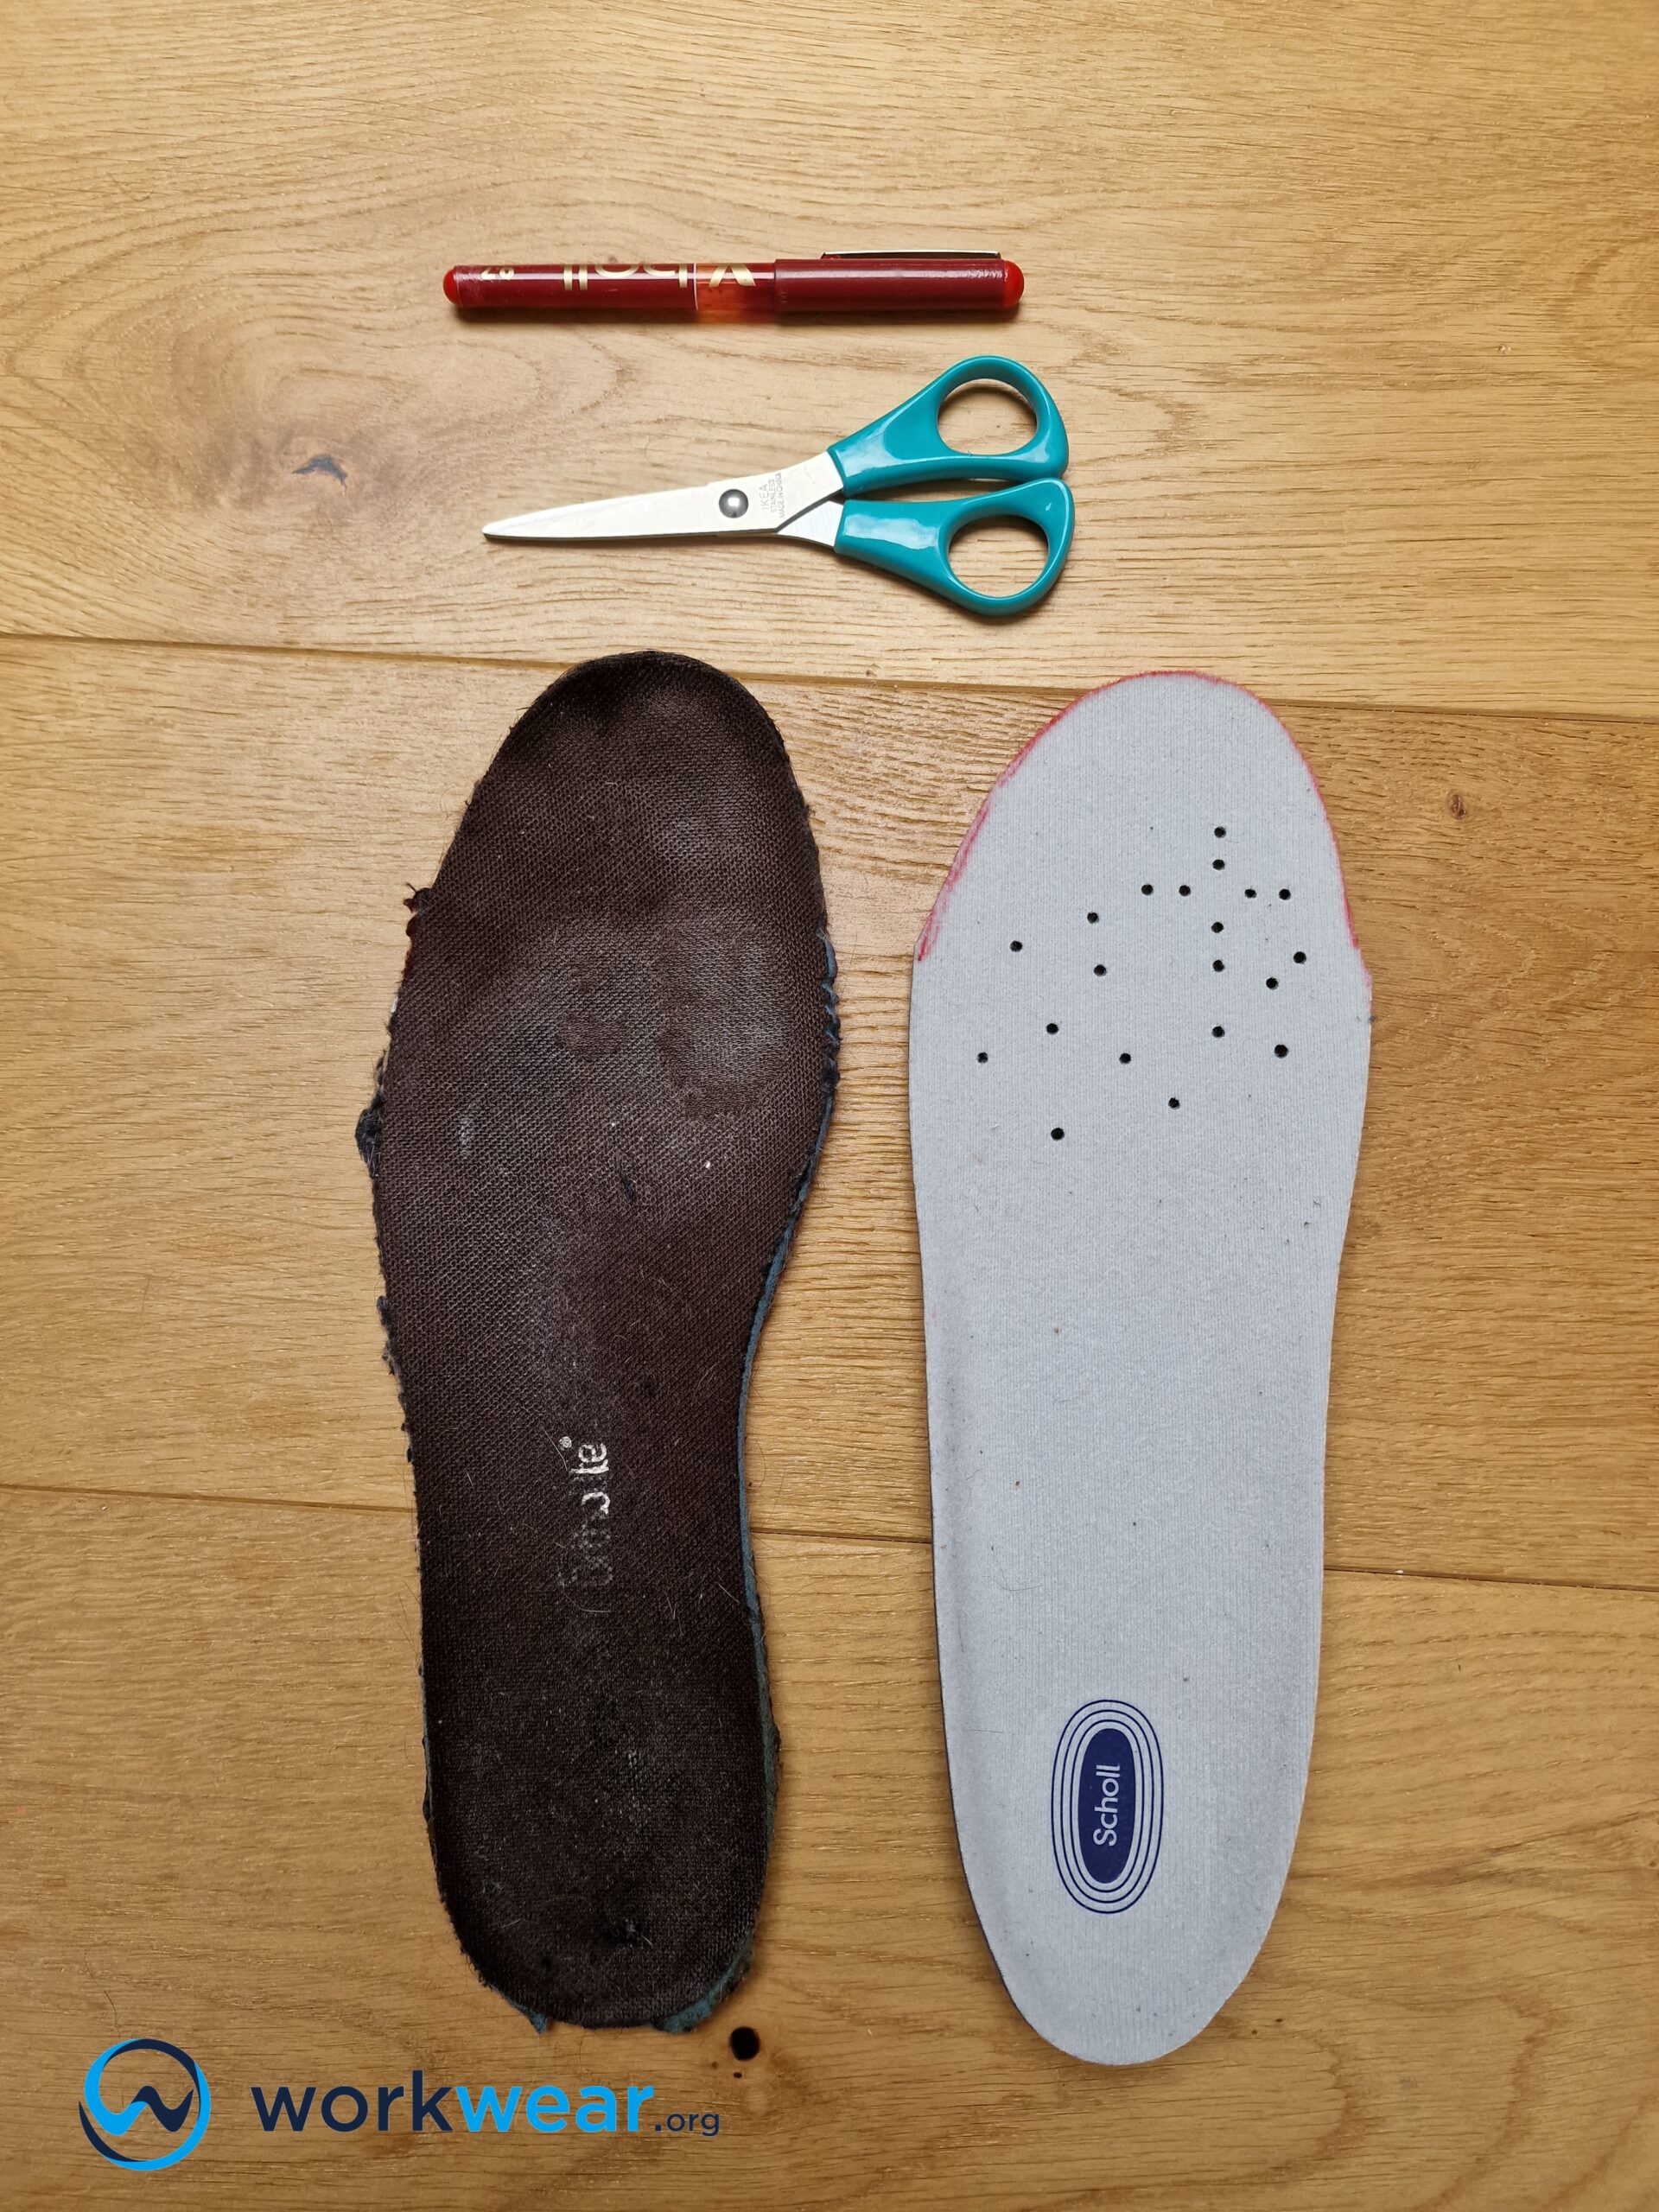
- Get the shoes or boots that you plan on putting the new insoles in and remove the original manufacturer’s insoles. Be careful with pulling out the insoles as they may be strongly attached or glued to the footwear’s body, and excessive force may damage the footwear’s interior.
- It’s important to check if the insoles in the boots or shoes you want to improve are removable. If the insoles are permanently attached, we don’t recommend trying to remove them since doing so can damage the footwear’s interior, so it’s best to leave them alone.
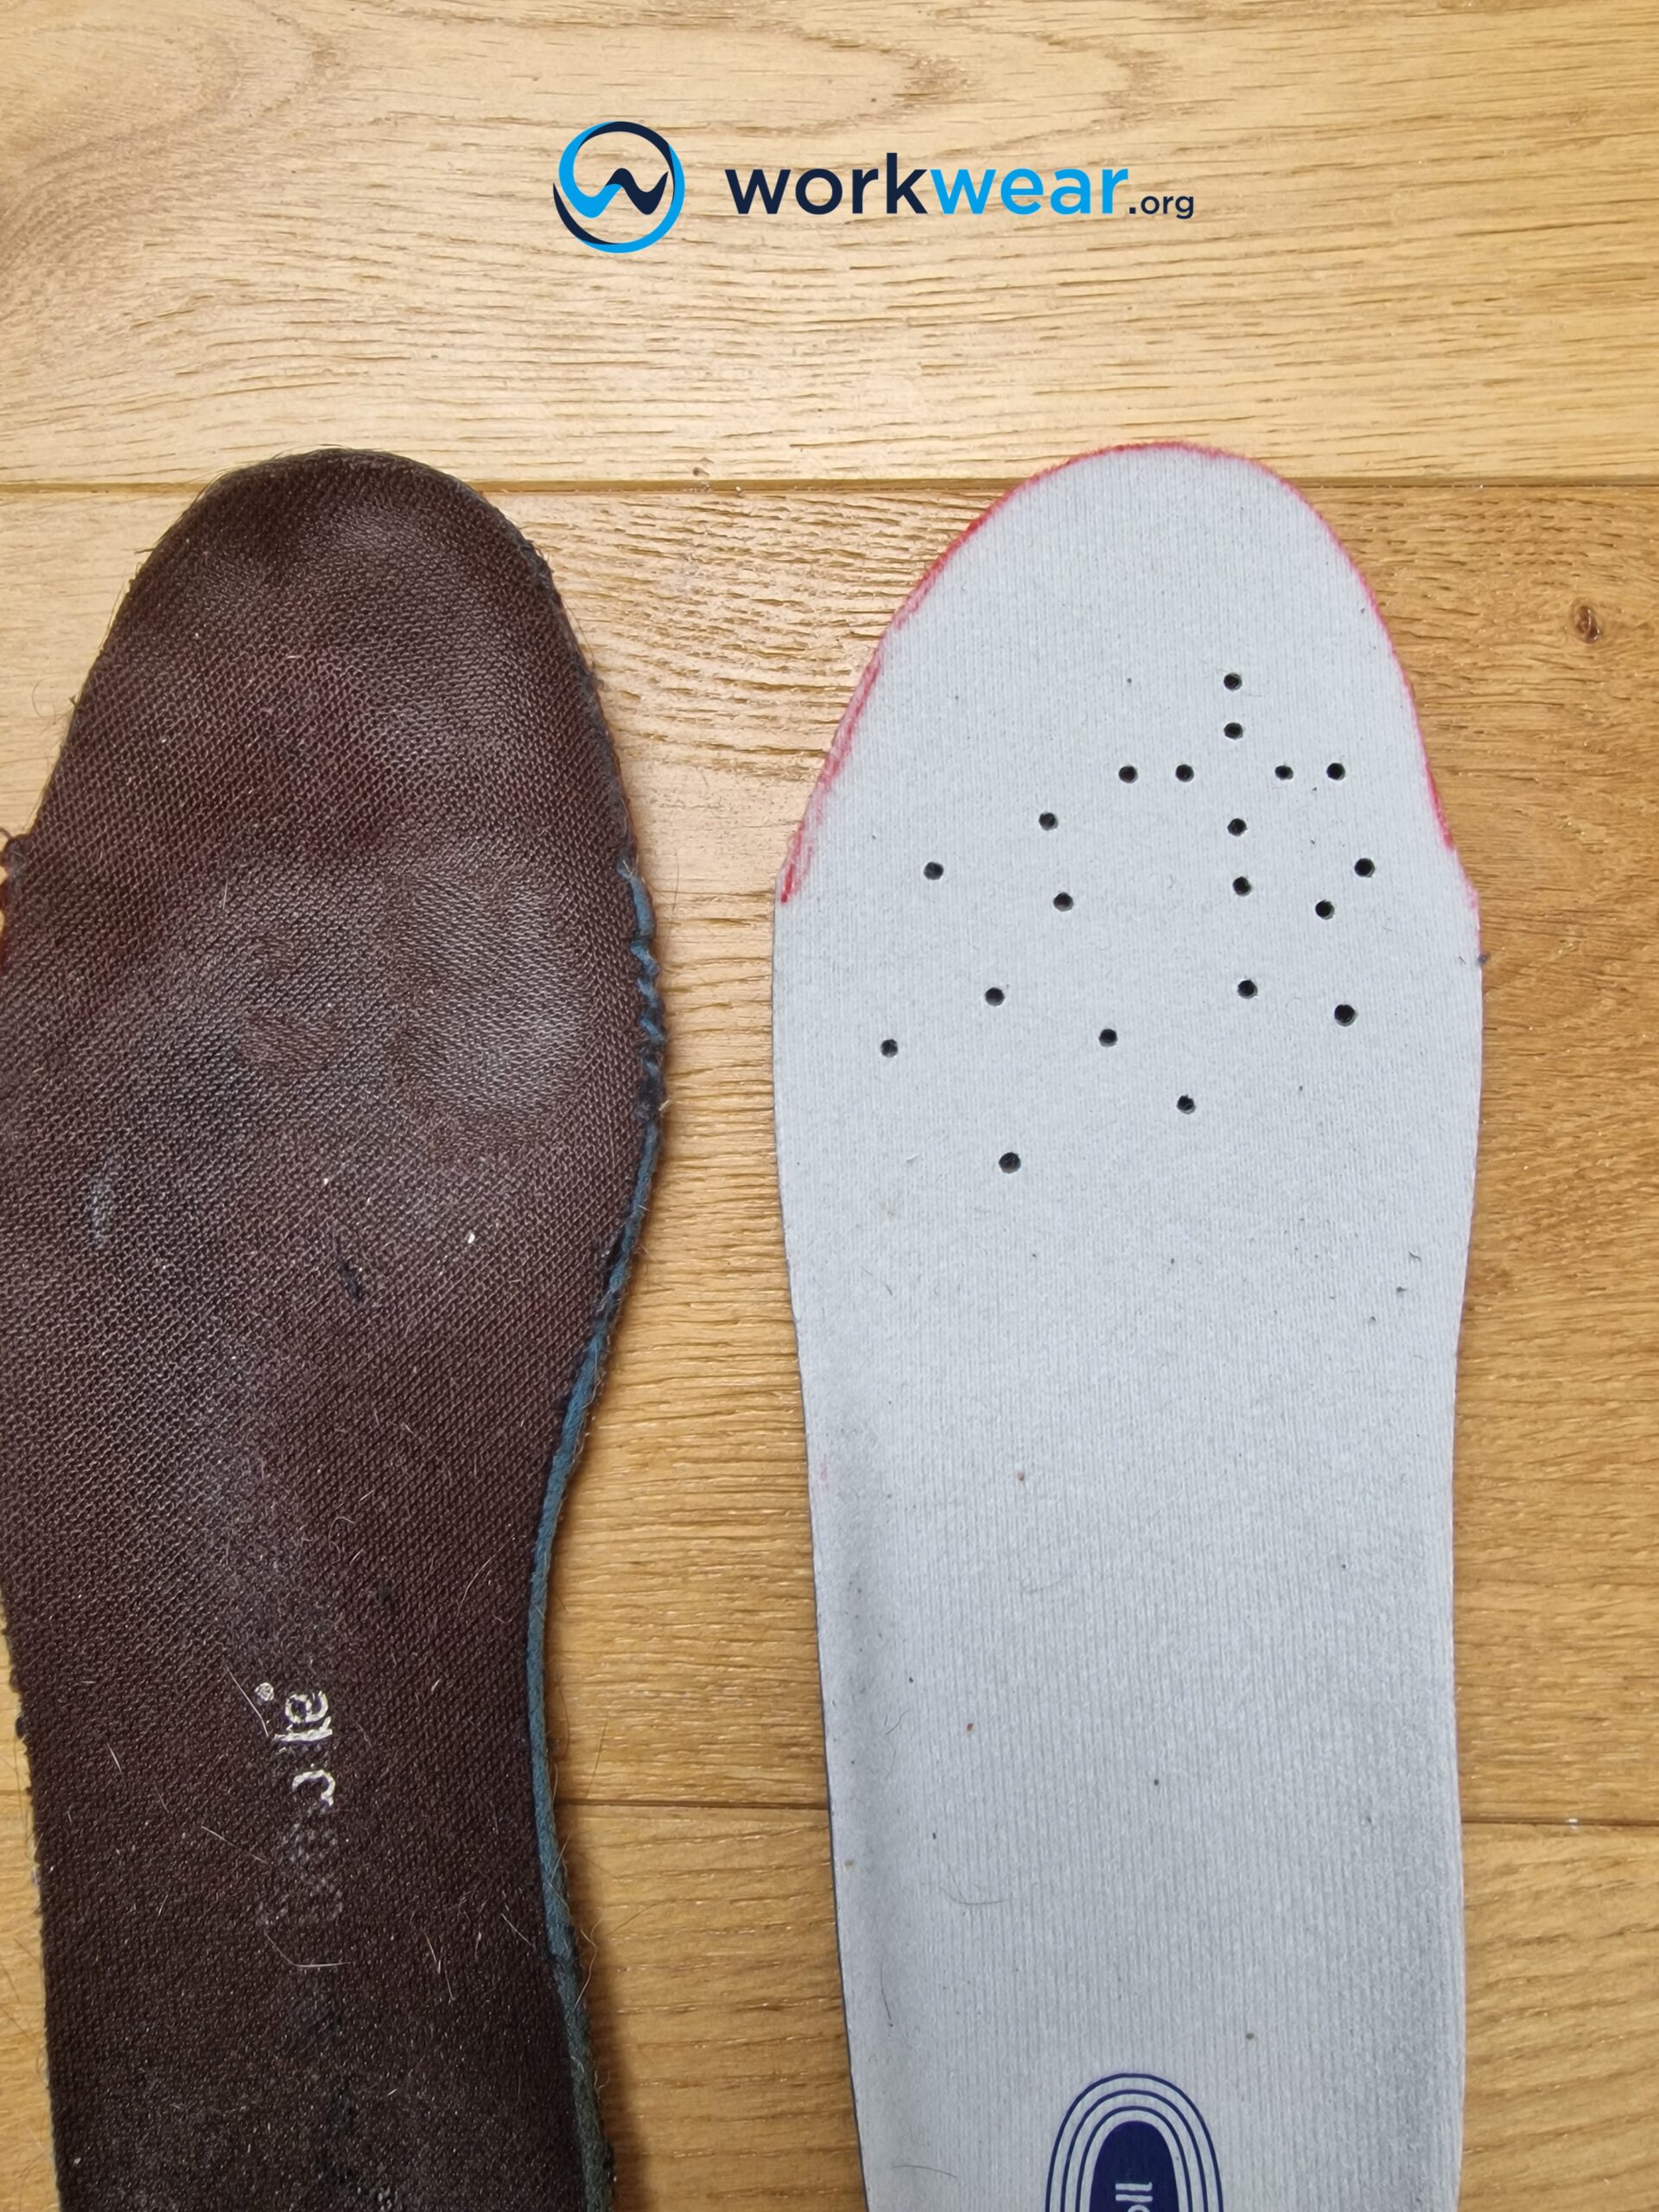
- Position the old insoles on top of the new insoles. Make sure that both insoles’ heel and forefoot areas are accurately lined up so you can get the correct outline of the original insoles onto the new ones.
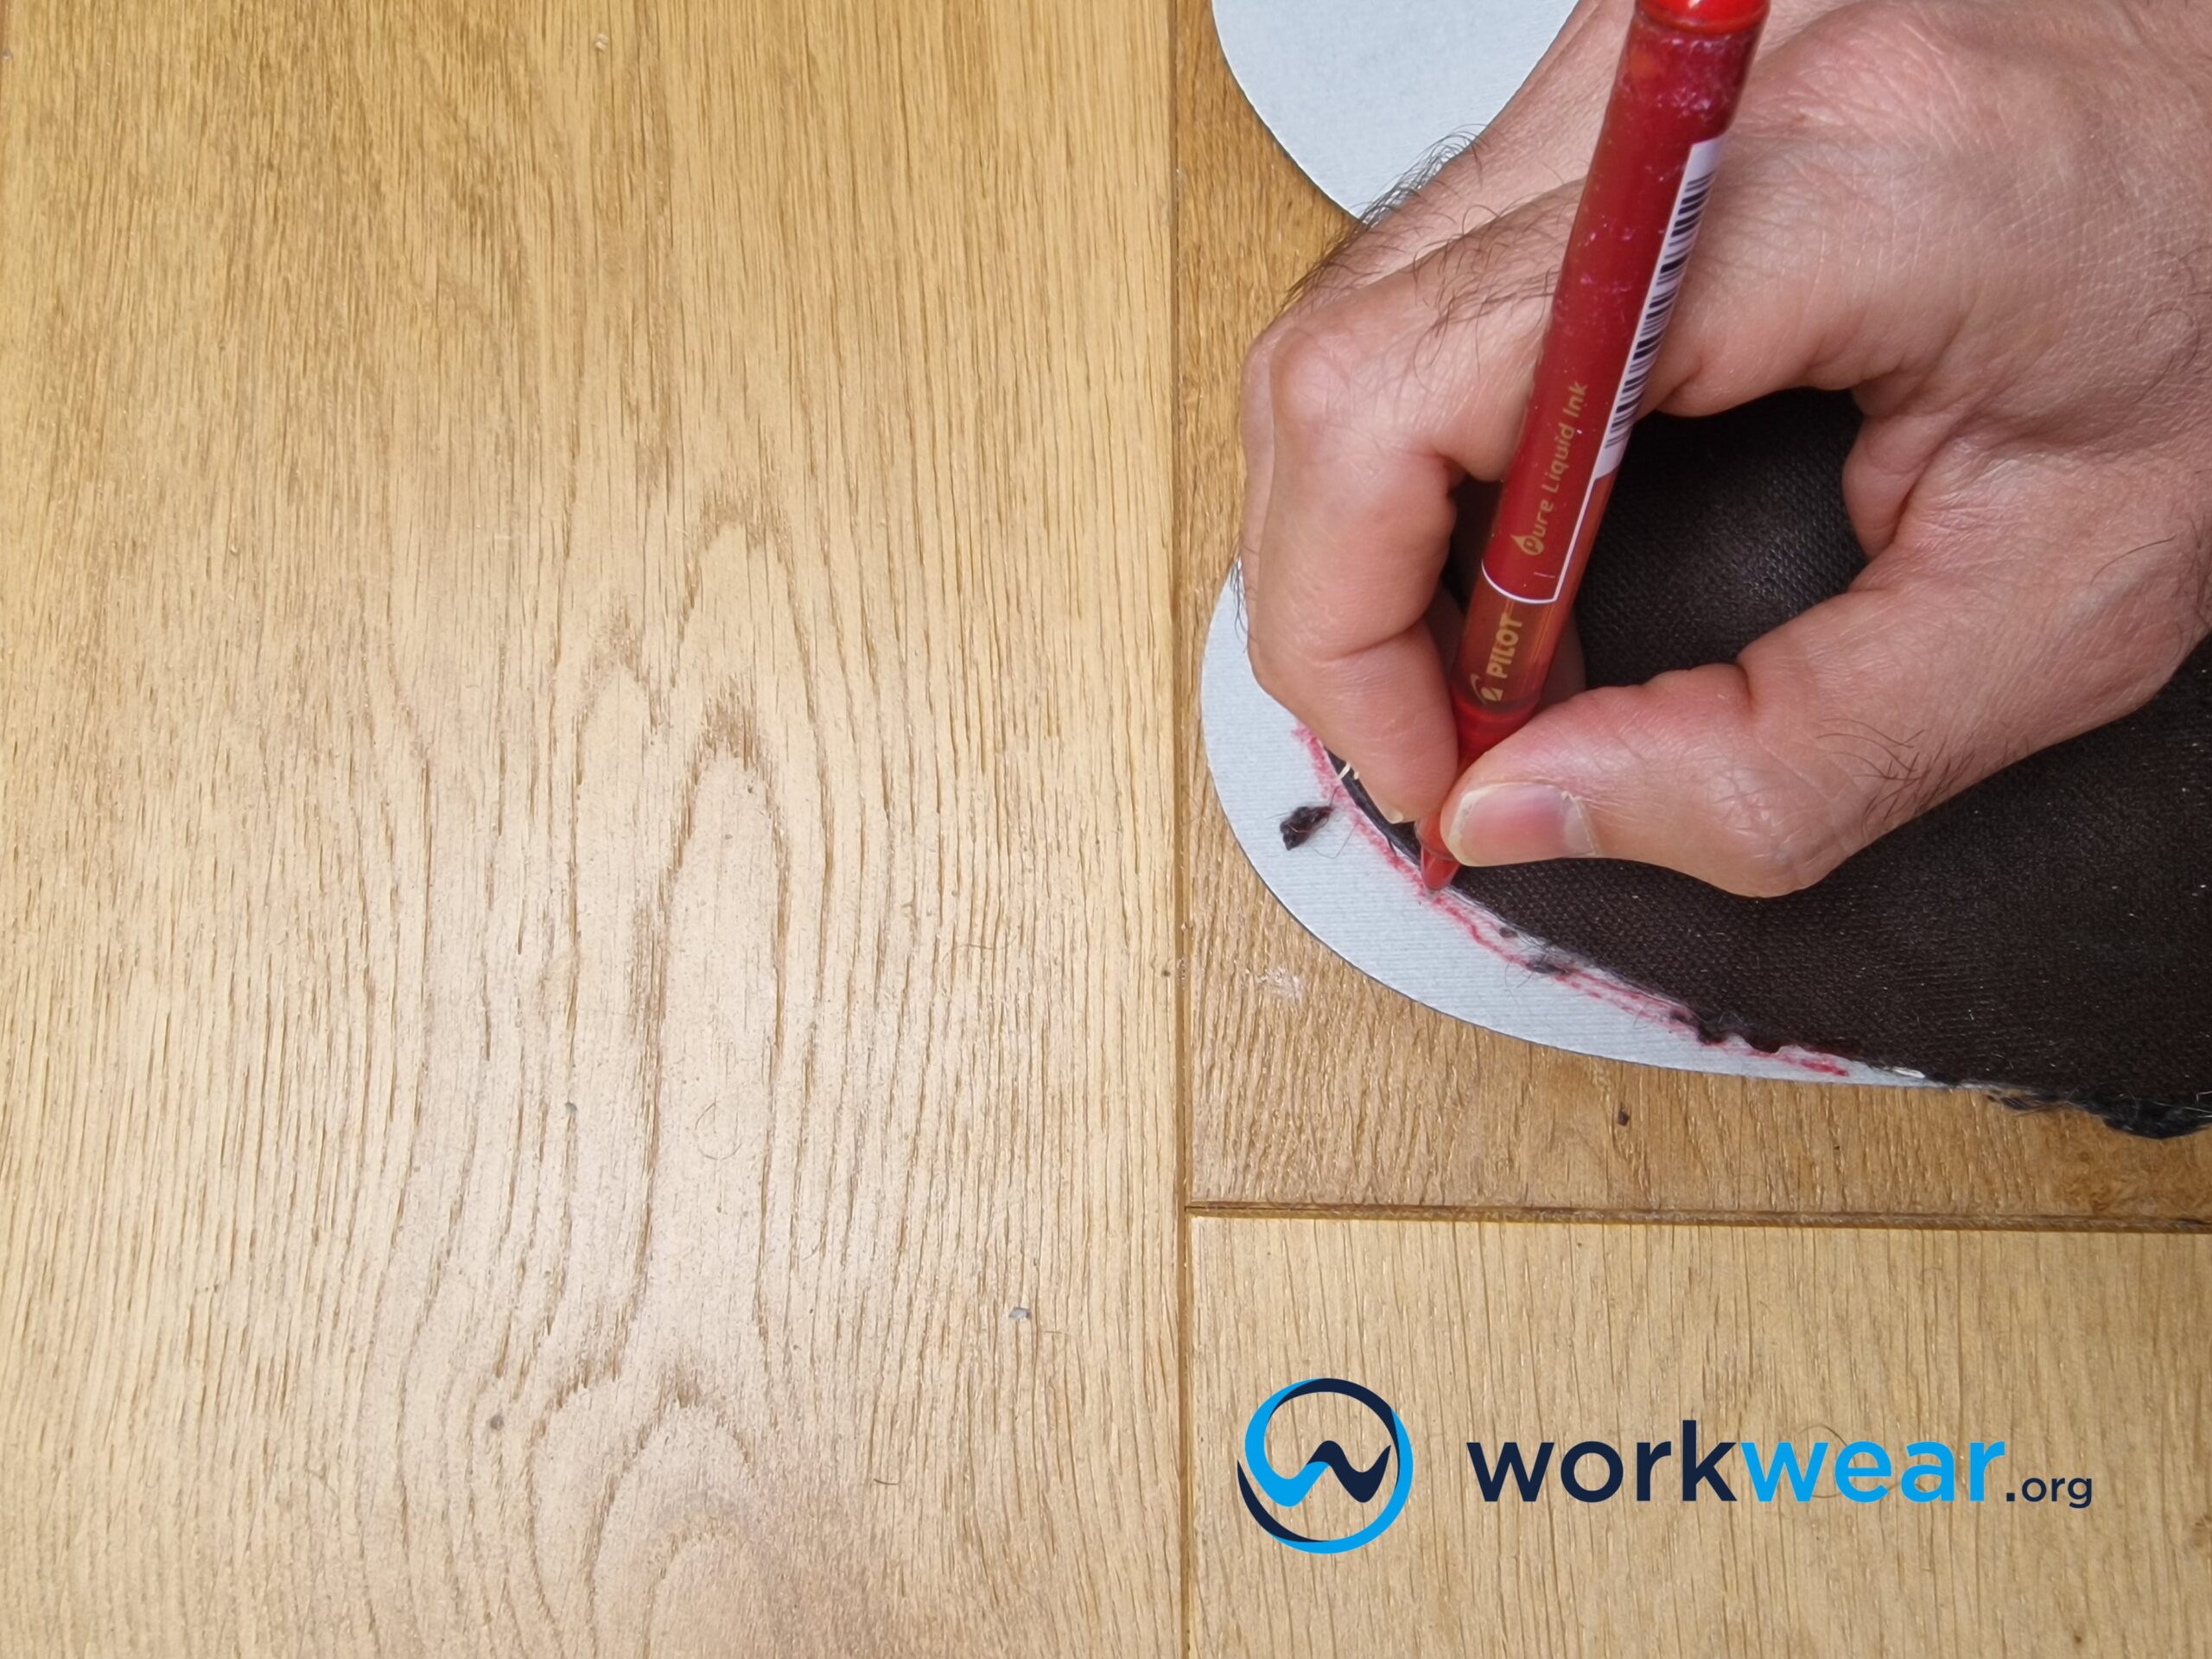
- Using a marker or pen, trace the outline of the manufacturer’s insole onto the new pair of insoles. Most of the time, you’ll only be able to trim new insoles to change their length. However, there are times when the insole can also be trimmed along the sides to get a better fit.
- After creating a clear outline of the new insoles to indicate the right size, take the time to double-check that you will only trim off what’s needed from the new insoles. This is because you won’t be able to undo the excessive trimming and may end up with much shorter or narrower insoles.
- Use a sharp pair of scissors to cut the insoles following the outline as a size guide. It’s best to use a hardy pair of scissors for this task as insoles are often made with fairly thick, tough materials that will be quite difficult to cut using small, flimsy scissors.
- Trim the insoles on the areas indicated by the outline to ensure that all edges are smooth. This will help the insoles fit better into the boots or shoes and result in more comfortable use.
- Avoid trimming on or near the heel area, as this is where the insoles’ enhancements are often placed. If you trim the heel portion, you run the risk of compromising shock absorption or other features, resulting in negative effects on the insoles’ performance.
- Slip the insoles into the boots or shoes to see if they fit properly. If not, you may need to make more adjustments to ensure that you can use the boots – and the insoles – comfortably when you walk.
Conclusion
Insoles improve the feel of boots’ and shoes’ interiors, making them more welcoming and comfortable. To take advantage of your new insoles, it’s important to ensure they have the correct size to fit perfectly into the footwear. Insoles can come in exact sizes or options that cover two shoe sizes, and these options make it easier to find the correct sizes while eliminating or reducing the need for manual trimming. On the other hand, insoles offered in just one size will need to be trimmed properly so they can fit into the corresponding footwear’s size. The correct size will give you a comfortable experience while using the insoles and help you maximize the product’s beneficial qualities.
FAQs
- Can we just fit bigger insoles into boots instead of trimming them?
- It’s not a good idea to place the wrong size of insoles into footwear because you most likely won’t maximize the insoles’ benefits. In addition, any excess material can chafe against your foot, causing blisters and overall discomfort when you walk.
- Can exact size insoles still be trimmed?
- Yes – insoles that come in exact sizes can still be trimmed to improve how they fit into shoes or boots. However, it’s important to check first that you won’t be cutting through essential components, such as those that offer support (in the arch area) and shock absorption (mostly in the heel portion). It’s also best to confirm via the manufacturer’s instructions if the insoles are suitable for trimming or not.
- When following the outline on the new insoles – is it better to trim inside the line or outside?
- It’s best to trim the new insoles outside the outline first. This is to help prevent taking off excessive amounts of material, which can lead to the insoles becoming too short or narrow. Of course, you can always cut off a bit more if the initial trimming results in the insoles being too large to fit into the boots or shoes – but you can’t make the insoles longer or wider if you trim off too much.
- What happens if small insoles are used for boots or much bigger shoes?
- If the insoles are too narrow or short, the produced gap can negatively affect how the feet are positioned inside the footwear. The gap can result in blisters forming because of unintentional friction. It can also make it harder for the wearer to walk comfortably, especially when the smaller insoles slide inside the boots or shoes.
Independent hands-on product testing Products Reviewed Combined Experience Field Testing
Why you can trust us
678+
24+ Years
500+ Hrs
Luke Davis
Luke is the lead author on WorkWear.org. He has a vast experience in construction engineering and project management in California and Texas, where he had the chance to put to test a wide range of safety boots and PPE. Outside work, Luke is an avid hiker and not surprisingly a DIY fanatic!